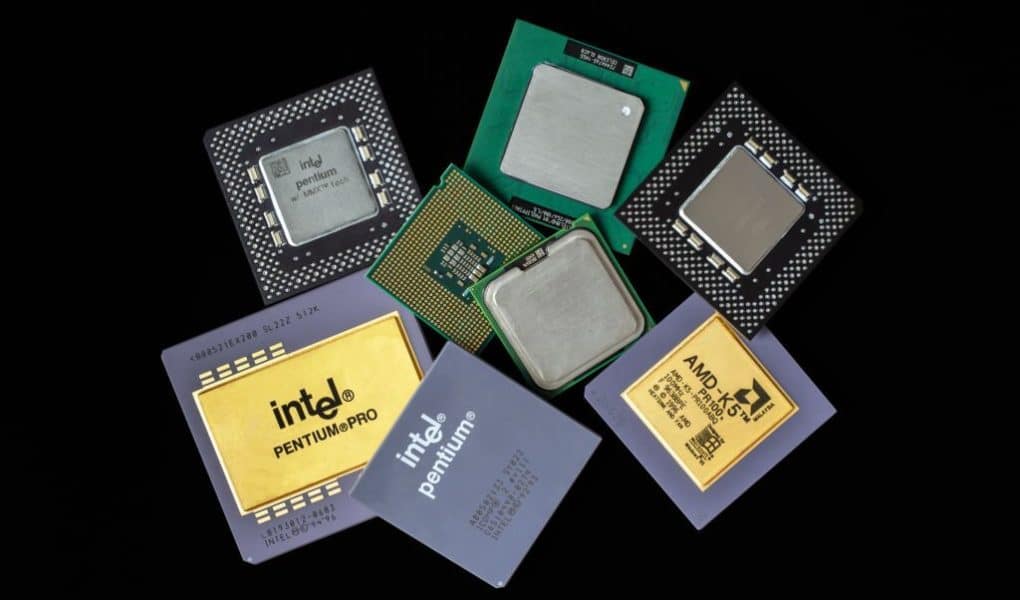
There was a time when everything revolved around the type of processor you had in your system. I remember asking people about what computer they had, and the answer was Pentium II, Pentium III, Pentium IV, etc. Since 2008 (when Intel introduced generations) processors are identified by their generation whereas the chipset model name (i3, i5, i7, i9, Ryzen 3, Ryzen 5, Ryzen 7) remains the same.
Almost every year, Intel and AMD introduce new generation CPUs in the market. And for beginners, it’s hard to find out which generation of processor is sitting on their motherboard. But it’s very easy to find out the current generation of your CPU without stripping it off your motherboard.
Contents
How to Identify Your Processor Generation
There are many ways through which you can know about this:
Method 1: System Information
This is the easiest method to find the current model and generation of your processor. Simply go to your desktop and right-click on ThisPC, and then choose “Properties“. This will open a new tab with all the needed information about your system.
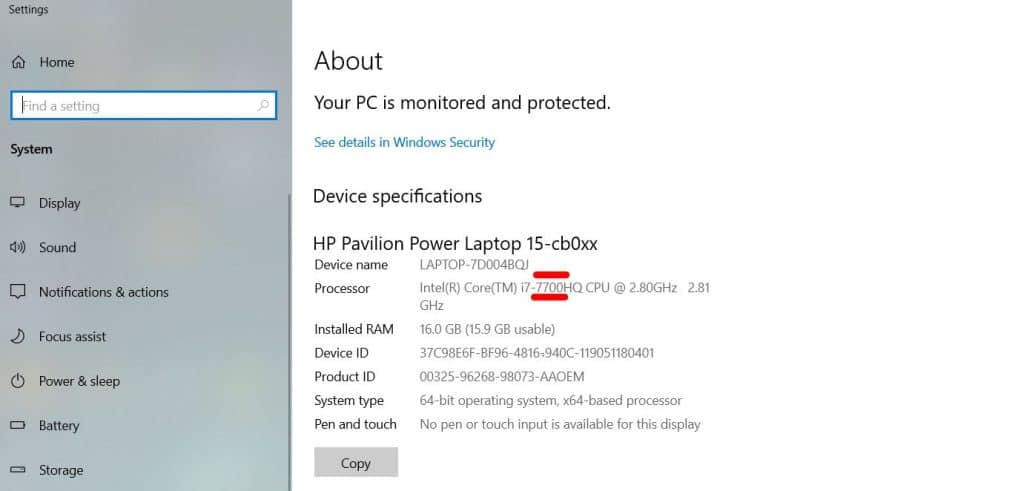
As you can see in the image above, I have Core i7 7700HQ CPU installed on my laptop. The “7700” denotes that I have a 7th-generation Core i7 processor installed on my laptop.
You can also access the same tab by navigating to Start > Settings > System > About.
Method 2: Through Taskbar
In this method, all you need is to press the Win + R key simultaneously, which will open up a small tab as shown below:
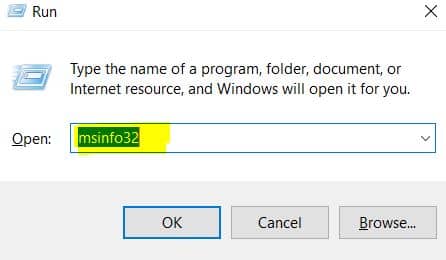
Once the Run tab opens, type in “msinfo32” without inverted commas and click on “OK“. This will open a new window with all the details of your processor.
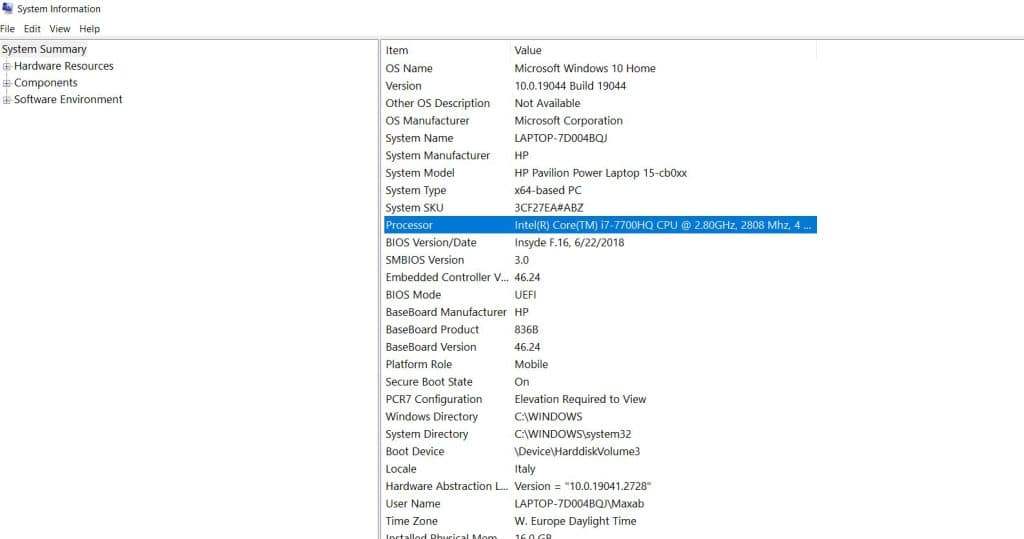
Method 3: Intel Identification Utility
Intel offers a free utility known as Intel Processor Identification Utility which shows you deep insights about your processor. This utility also shows you the chipset information, technologies supported by your processor, and graphics information as well.
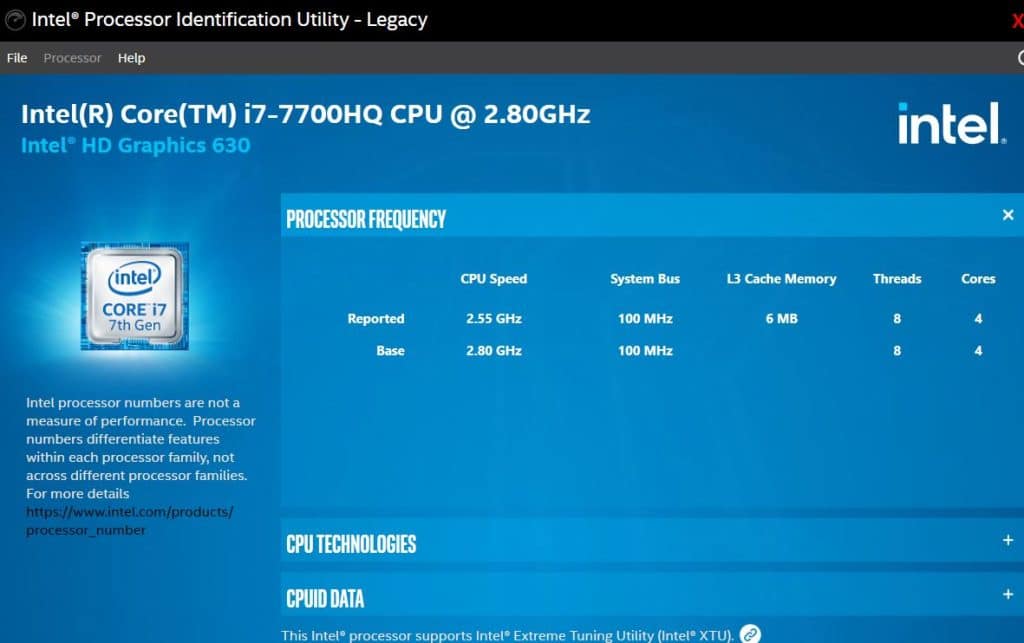
You can also use third-party utilities like CPU-Z, HWinfo, etc to get deeper insights about your processor.
Method 4: From BIOS
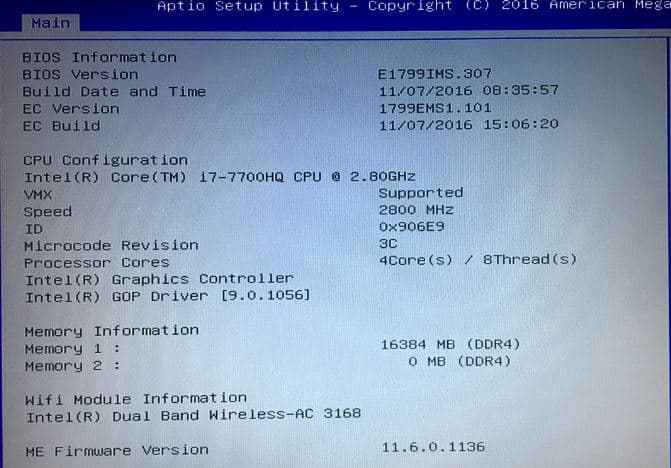
Your system’s BIOS contains all the necessary information about your hardware. As soon as you enter the BIOS, you will see detailed information about your CPU and other hardware. See the image below for reference:
Method 5: Through Control Panel
In order to check your CPU generation, go to Control Panel in Windows. Once you are inside, search for Device Manager and open it.
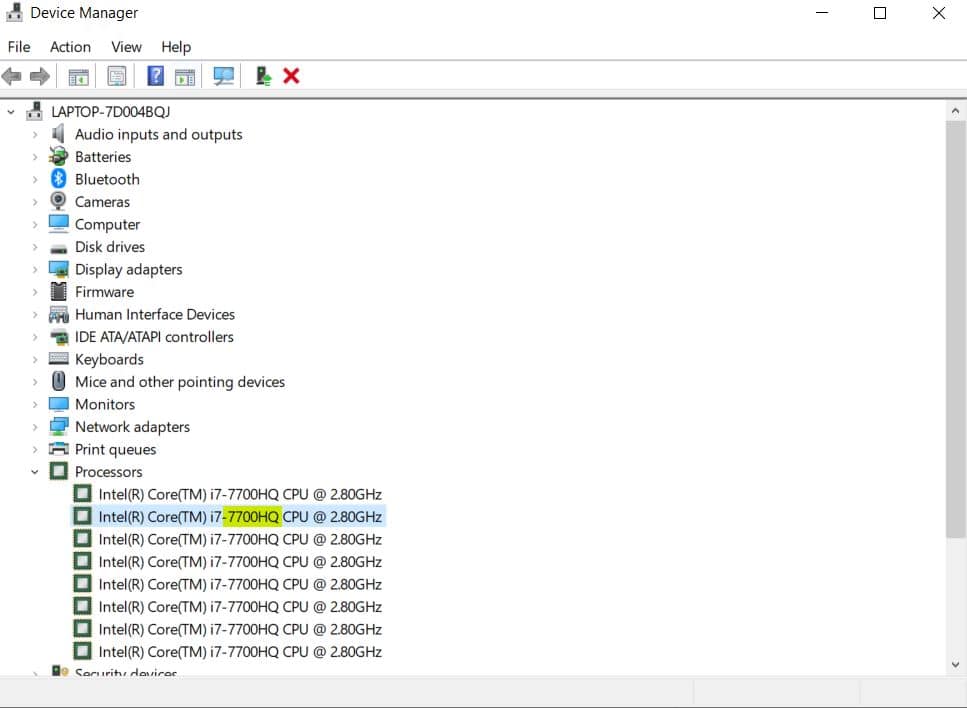
Within the Device Manager list, look for “Processors” and click on the triangular button to expand the list. I’ve highlighted the generation of my CPU with a yellow marker.
Method 6: Using Command Prompt
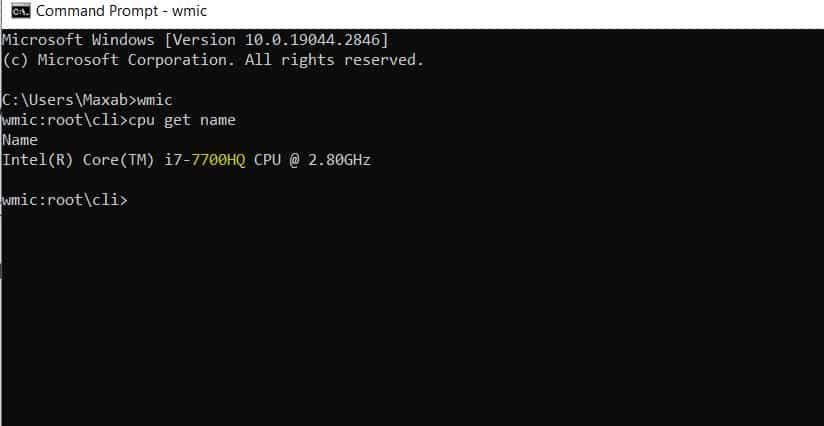
You can get more details about your processor by heading to the command prompt.
- Click Start at the bottom of the screen and then type Run
- Once the Run box shows up, type in cmd and press Enter. This will open up the Command Prompt window
- Once you are within the Command Prompt, type wmic and press Enter.
- Now copy and paste cpu get name and press Enter
Conclusion
Finally, these were some of the most easiest methods to identify the generation of your CPU. These methods apply to most versions of operating systems like Windows 7, Windows 8, Windows 10, and Windows 11.

Hi, my name is Masab, a die-hard PC enthusiast and founder of this blog. I love to share my prior experience with computers on this blog. Ask me anything about building a PC or troubleshooting PC errors, I’m here to help.

